|
Edit Production Release Generation Settings |
  
|
Edit Production Release Generation Settings
|
Edit Production Release Generation Settings |
|
The generation settings that you selected in the Production Release Settings dialog box (Production release settings) will override the Generation Options (Edit local release generation options) that you have defined in the Decision Manager when you perform a Production Release.
STEPS to Edit Production Release Generation Settings
1. |
Select the Tools > 'Edit Production Release Settings' menu option which is available when there is no repository open. |
2. |
Open the tabs as detailed below to edit the generation settings (In this example we are editing the Repository (Default) settings): |
Pre-build and Post-build
In the Pre-build or Post-build tab (whichever is appropriate), select the relevant deployment file using the Browse button and enter the appropriate arguments in the Arguments field. Try using the ProdnPrebuild.bat and ProdnPostbuild.bat files in ..\Program files/Idiom Software/IDIOM Decision Manager 4.5/Sample Files.
Make sure to set an appropriate timeout period.
Tip |
When performing a production release, do not use Pre-build or Post-build batch files that require user interaction (such as 'Press enter to continue' or 'pause') to complete the batch process. If you wish to try using examples from our sample files, make sure to use the 'ProdnPrebuild' and 'ProdnPostbuild' .bat files as they do not require an external response to complete. |
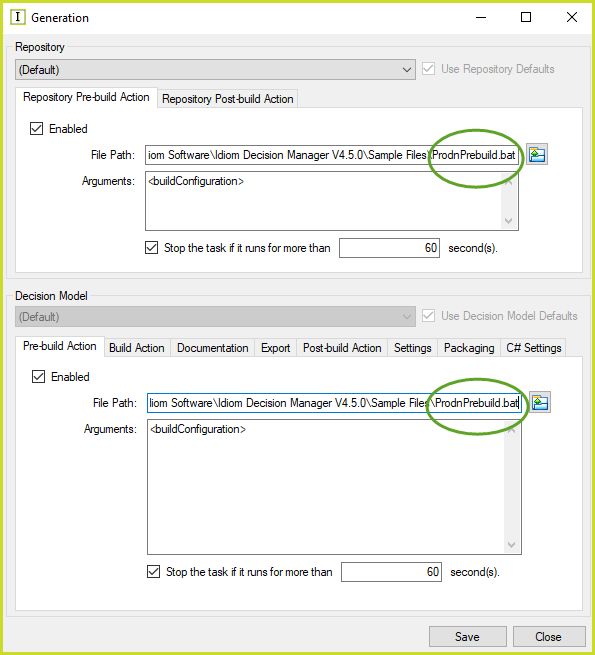
Figure 7-36(a): The Pre-build area of the Generation window
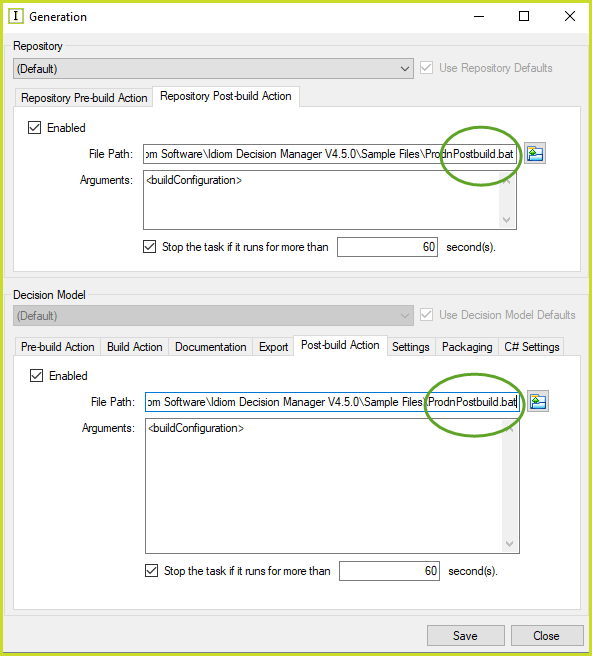
Figure 7-36(b): The Post-build area of the Generation Options window
NOTE: You cannot use Prebuild and Postbuild batches that require a response from the user before continuing on with the production release process.
Build Action
The Build Action tab settings must be specified before the release can be run. You must specify the generation path where the generated code will be saved, and select the generation platform (Java or C#).
Note: If you choose the Java platform you must enter the path to the JDK Home in the Java settings tab.
You can also decide whether or not you wish the generated file to be compiled or not. If you do select the compile option, you must also specify the compilation Path and Binary File Name.
Using 'path variables' e.g. <decisionModel>, in the Binary file name ensures the release artefacts (when more than one decision model) are not overwritten. See Production release generation settings for a list of the available path variables.
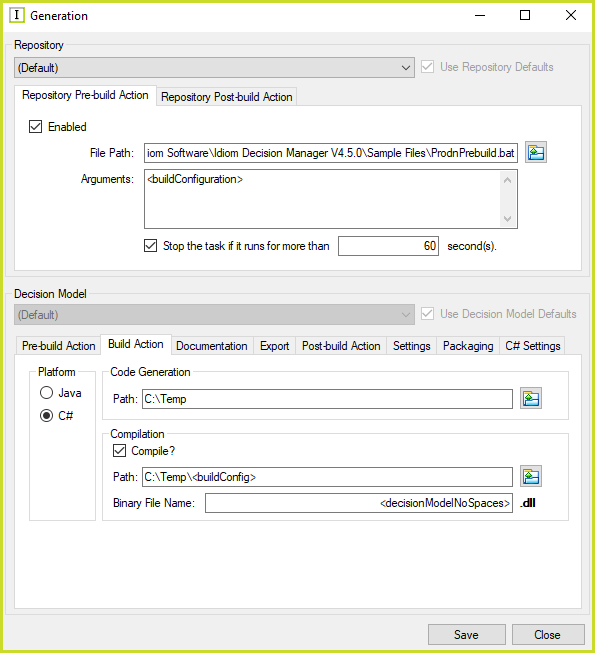
Figure 7-36(c): The Build Action area of the Generation window
Documentation
Under the Documentation tab you can specify whether or not you wish the repository to be documented as a .pdf. Click in the Generate Documentation check-box, fill in the appropriate Path and file name to specify where to place the .pdf generated document.
When releasing more than one decision model, using 'path variables' ensures the release artefacts are not overwritten.
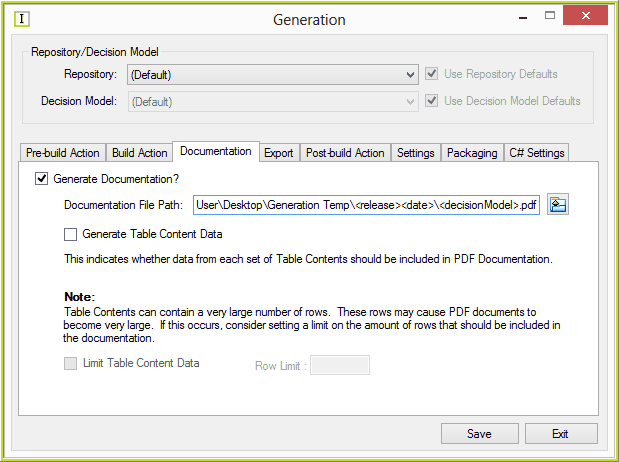
Figure 7-36(d): The Documentation area of the Generation window
Export Tab
The Export Tab allows you to specify whether the repository should be exported or not and enter the path, file name and encryption status of the exported file.
This area also enables you to adjust the creator status of the repository upon export, enabling you to export the creation rights to the repository to a specified alternative user, allowing them to make changes to the exported repository/decision model. You do this by checking the 'Export document uncontrolled' check-box. (See also Exporting the Repository)
When releasing more than one decision model, using 'path variables' ensures the release artefacts are not overwritten.
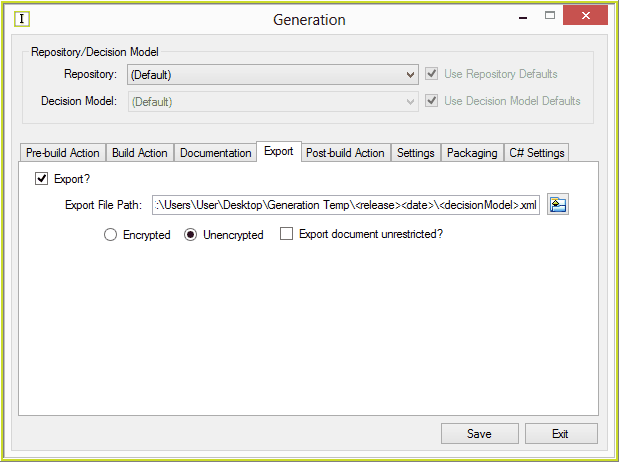
Figure 7-36(e): The Export area of the Generation window
Java Settings
The Java Settings tab is where you specify your java settings such as the location of JDK. You can type in a path name, or click on the browse  button to browse to your file, or use the Autodetect JDK buttons
 .
You can also enter Compilation and JAR arguments in this area.
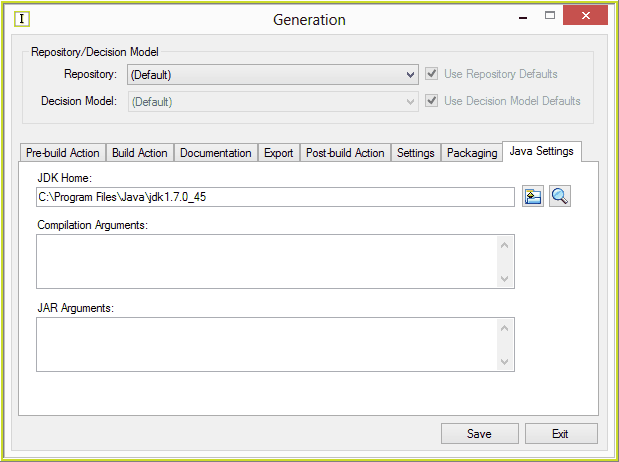
Figure 7-36(f): The Java Settings area of the Generation window
Settings
The Settings tab is where you can specify the timezone, precision, ToString formats, and select whether or not to generate logs and comments. These settings can also be set for In-Line Testing, and are described in more detail under this topic.(see In-line test Settings).
Note that settings specified in the Generation Window always override those specified in the decision model's Properties dialog box when performing a production release.
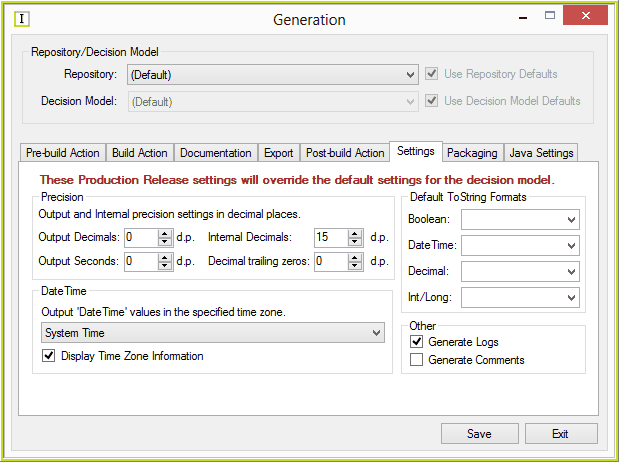
Figure 7-30(g): The Settings area of the Generation window
Packaging
Finally, the Packaging tab is where you can specify settings for each decision model determining if you would like all or some of the deployed assets packaged in to a zip file.
If this option is selected, all Contents that are selected below are zipped and saved in the selected 'Package File Path'. When releasing more than one decision model, using 'path variables' ensures the release artefacts are not overwritten.
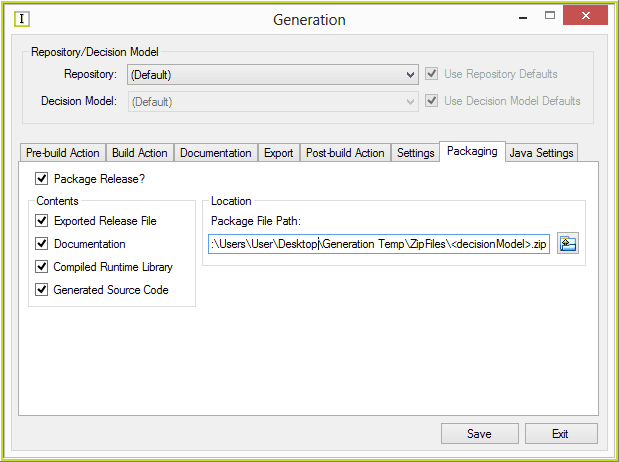
Figure 7-36(h): The Packaging area of the Generation window
2. |
Once you have made the appropriate changes in the Generation window, click on 'Save'. Alternatively, you can click on Close to close the Production Release Settings dialog box if you do not wish to proceed with your changes. |