Creating Expected Output Files |
  
|
Creating Expected Output Files |
|
As mentioned above, your IDIOM installation includes some sample test 'input' and 'expected output' (also referred to as 'known correct output') files that can be used with the Vehicle Insurance Demo repository.
When changes are made to a decision model and a new test result delivers the correct response, it can be captured and used as an expected output file for subsequent test comparisons (see Comparing with Expected Output).
STEPS to create individual 'expected output' files.
1. |
Import the input file/s you wish to test (See Importing Test Input files) and click on the execute button |
2. |
Right-click on the row and select 'Show Test Results' to open the input and output document side by side. |
3. |
Carefully check the data generated in the output file to ensure it is as expected. Note - Differences between the input and output file are highlighted in Yellow. |
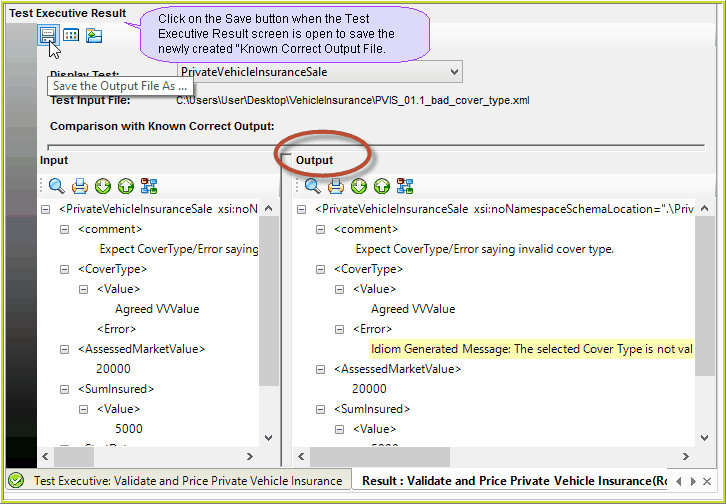
Figure 7-28(a) Saving a single 'Known Correct Output' file.
4. |
If any outputs are not as expected, amend your decision model, and/or Advanced Settings options, and re-execute your tests using the 'Build and Test' option on the execute button, until all outputs are as they should be. |
5. |
Once you are satisfied the output data is correct, click on the Save button to save the known correct output file into an aptly named folder your directory. |
Tip |
We recommend you save the expected output file/s in to a sub-folder (with a name other than 'Outputs') within your Input files folder. This will help ensure that input and expected output files remain together and in sync. |
STEPS to create a folder of 'Known Correct Output' files.
If you have multiple documents that you wish to create new expected output files for, you should save the documents in to one folder on your directory.
1. |
Import the folder of files you wish to test in to the test executive (See Importing Multiple Files). |
2. |
Change the 'Output' folder path/name. As a default, Idiom creates (if not already created) a sub-folder named `Output' which is contained within the input (in this case 'VehicleInsurance') folder, to place newly generated outputs in to. You should not save files that you wish to keep as expected outputs in to this folder, as they could easily be overridden when the next test is run. Right-click on the row, and click 'Select Output Folder' and select an aptly named folder where you wish to store your new expected outputs. |
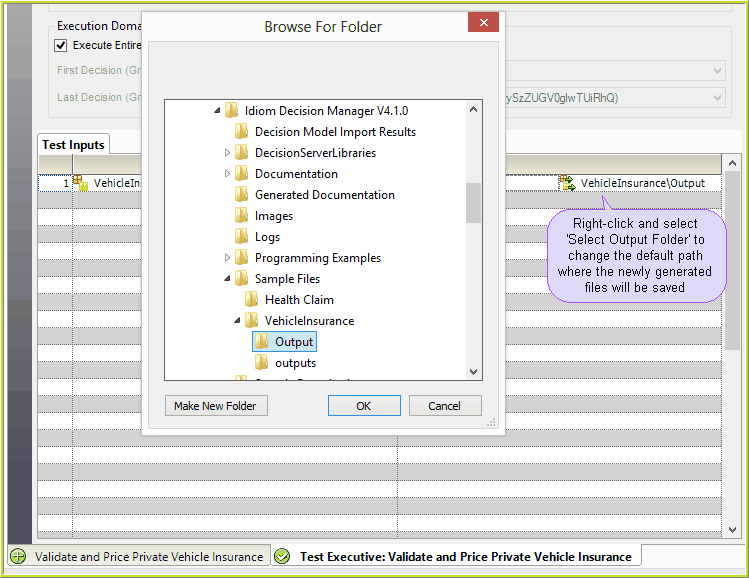
Figure 7-28(b) Saving a folder of 'Known Correct Output' files.
3. |
Ensure your Advanced Settings are correctly set, and click on the execute button |
4. |
Right-click on the Test Inputs row and select 'Show Test Results' to open the Folder Input for that row. |
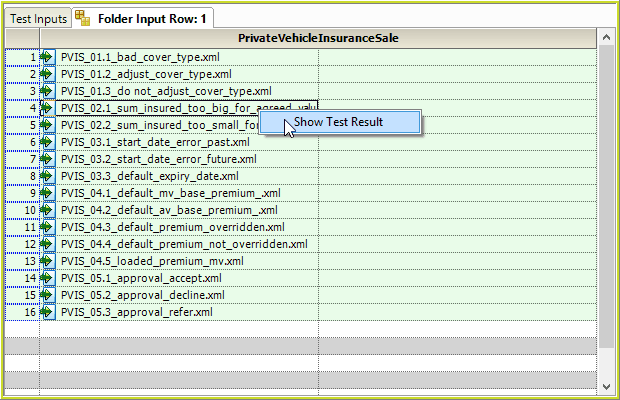
Figure 7-28(c) Test Results for Folder Input Row 1.
5. |
Right-click on each row and select 'Show Test Results' to carefully check the data generated in each output file is as expected. Note - Differences between the input and output file are highlighted in yellow. |
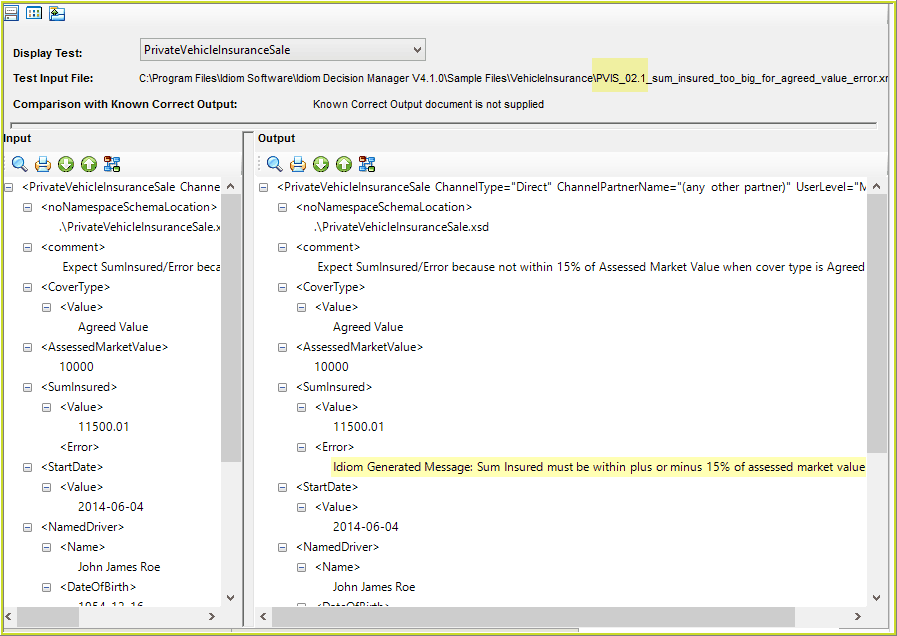
Figure 7-28(c) Test Results for Folder Input Row 1.
6. |
If any outputs are not as expected, amend your decision model, and/or Advanced Settings options, and re-execute your tests using the 'Build and Test' option on the execute button, until all outputs are as they should be. |
7. |
Once you are satisfied the output data is correct, the newly created files can be uploaded in to the Test Executive as 'Expected Outputs' and used for regression testing whenever changes are made to your repository. |
Tip |
If you remove the prefix 'xx_' from the expected output file names, they will be identical to the input file names. This can be useful when testing folders of files, as it enables input and expected output files to match up, even if some of the files in each folder get out of sync. (i.e. a file has been accidentally added or deleted). |
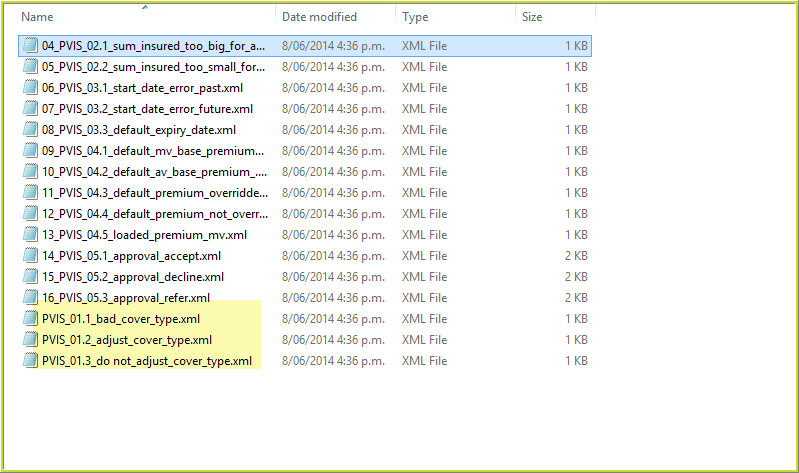
Figure 7-28(d) Renaming your Expected Output folder of files to match your Input files.
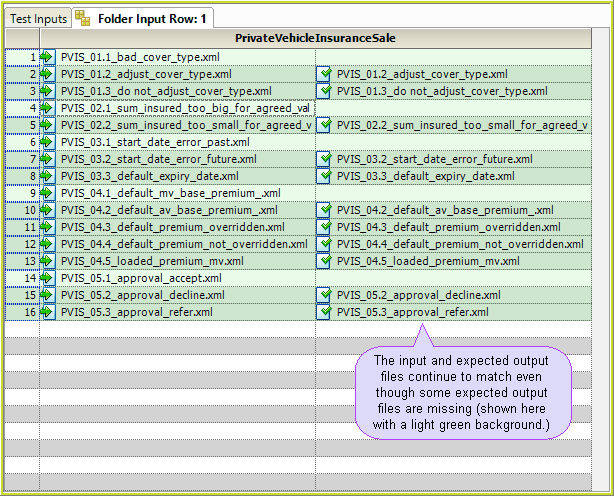
Figure 7-28(d) Inputs will find matching expected outputs with the same name, even if the uploaded folders have missing files.
 in the test executive.