Compare Imported Decision Models |
  
|
Compare Imported Decision Models |
|
Before importing any data, it is possible to view and compare details of the decision model you have open, with details of the decision model you are about to import. This provides a preview of the changes that will be implemented when the import is processed, and hence allows the user to carefully check the changes that will come through, prior to that actually happening, and to check that all the changes that are expected have been selected and are present.
To enable this, we will open the Repository Comparison Viewer pane directly from the Import Decision Model dialog box prior to undertaking the import.
STEPS
1. |
If you don’t already have the Vehicle Insurance Demo repository installed, import the standard 'VehicleInsurance.idm' repository (../Program files/Idiom Software/IDIOM Decision Manager v4.5/Sample repositories/VehicleInsurance.idm). (See Importing a Repository) |
2. |
Open the Vehicle Insurance Demo repository and open the 'Validate and Price Private Vehicle Insurance' Decision Model |
3. |
Click the Import Icon |
4. |
Select the 'Vehicle Insurance Demo BAU' repository from the list of imported repositories. |
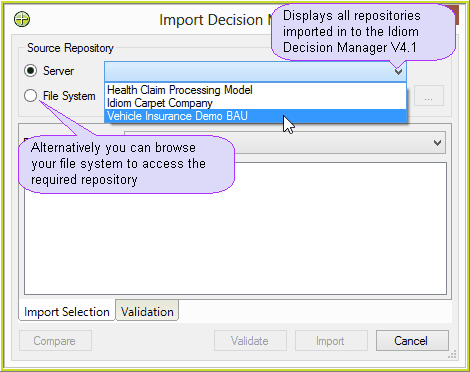
Figure 3-61 Import Decision Model dialog box
Note: The 'Vehicle Insurance Demo' repository is not available as you cannot import a decision model in to itself. If needed you would need to export a copy of your current repository first. (See Exporting a Repository)
5. |
Select the Validate and Price Private Vehicle Insurance decision model and select the decision groups and decisions that are to be imported. In this scenario we want to import the new decision group 'Add Loadings', and all of its child decisions and formulas, as these are the additions and changes made in the BAU version of the model. |
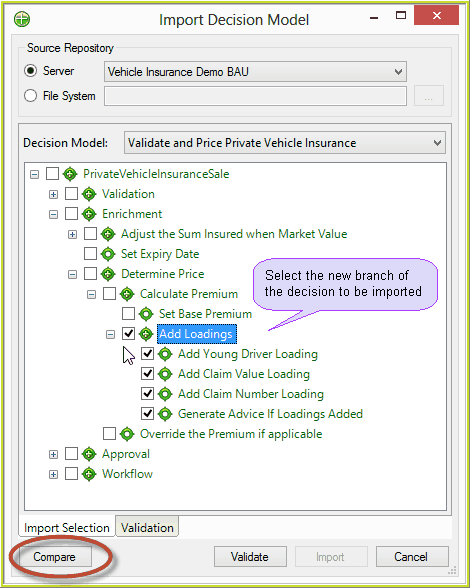
Figure 3-62 Import branch selection
6. |
Click the 'Compare' button to undertake the selected comparison. > Repository Comparison Viewer: |
The Repository Comparison Viewer is opened, with the differences between the source and target decision models identified.
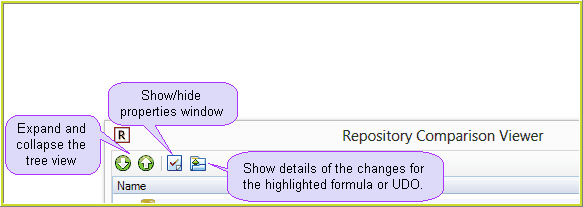
Figure 3-63(a) Comparison toolbar icons.
To expand the tree so that all comparisons are exposed use the Expand / Collapse buttons on the taskbar. 
The Properties section in the lower part of the screen shows the comparison between the two decision models for the selected item – the 'Add Claim Value Loading' formula in this example, with differences highlighted in yellow.
Changes to the contents of a formula or UDO can also be viewed from this screen. Click on the 'View Formula Version/UDO changes'  icon on the taskbar, or double click on the selected formula Version or UDO to view the content changes
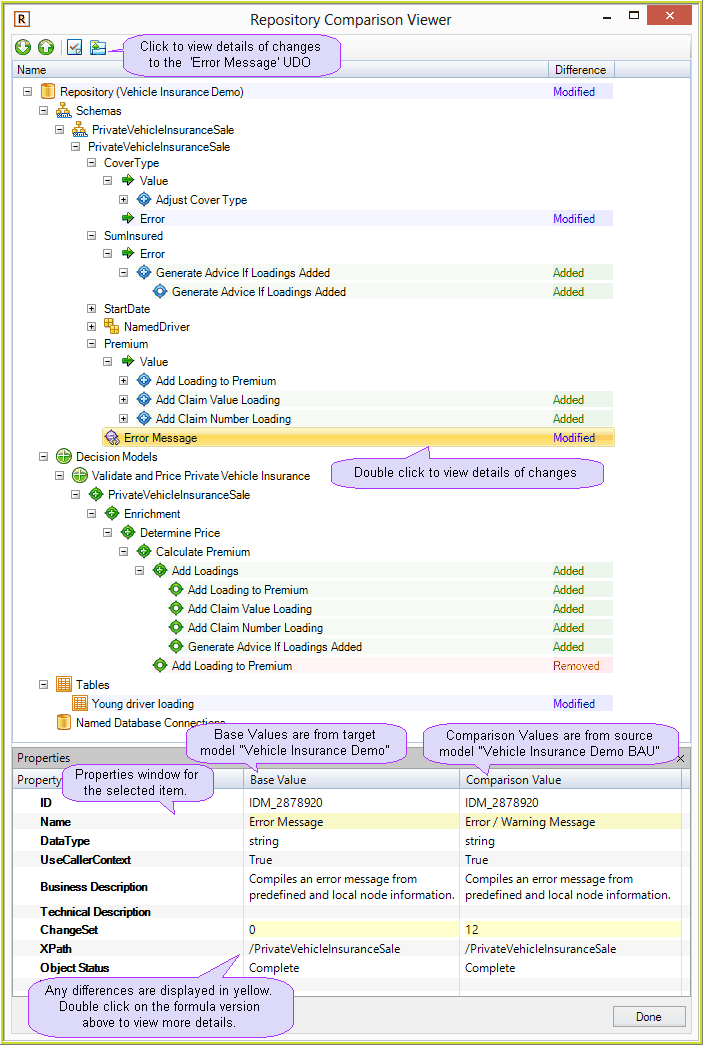
Figure 3-63(b): Highlighted differences between the Base and Comparison decision models.
In the above example we can see the differences in the decision models:
•Added - means the item is not currently in the Base model, but is in the model to be imported.
•Modified - means the item is in both models but there are differences between them
•Removed - means the item is in the Base model but is not in the model to be imported.
NOTE: All differences between the models display, regardless of whether you are importing that branch of the decision model or not. This enables you to determine which branches of the decision model you may, or may not wish to import.
7. |
Double click on the 'Generate Advice If Loadings Added' Formula Version to view details of changes to the formula content. |
The changes to the operations of this formula are now listed in the upper window. In this example the formula was a new formula that was added to the decision model, so each of the operations in that formula is listed as being added.
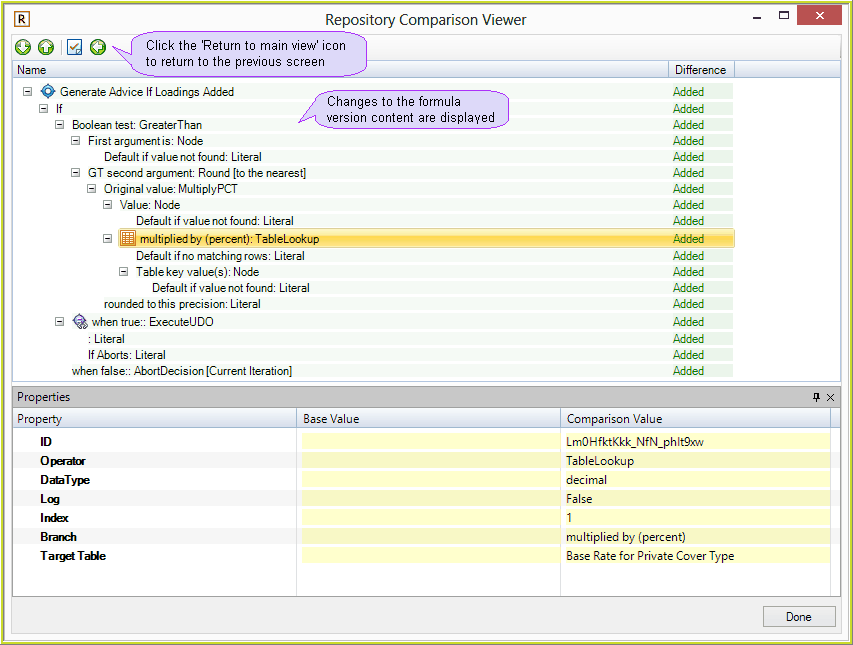
Figure 3-63(c) View Formula Version Content Changes
8. |
Click on the 'Return to main view' |
Comparison Overview Report
1. |
Click on the Show Comparison Overview icon in the Taskbar |
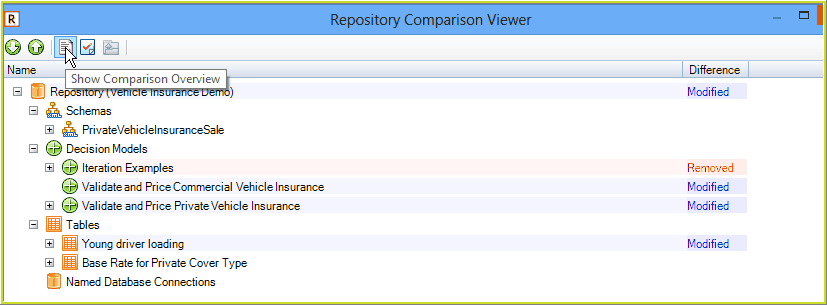
Figure 6-113(a) Comparison Overview Icon
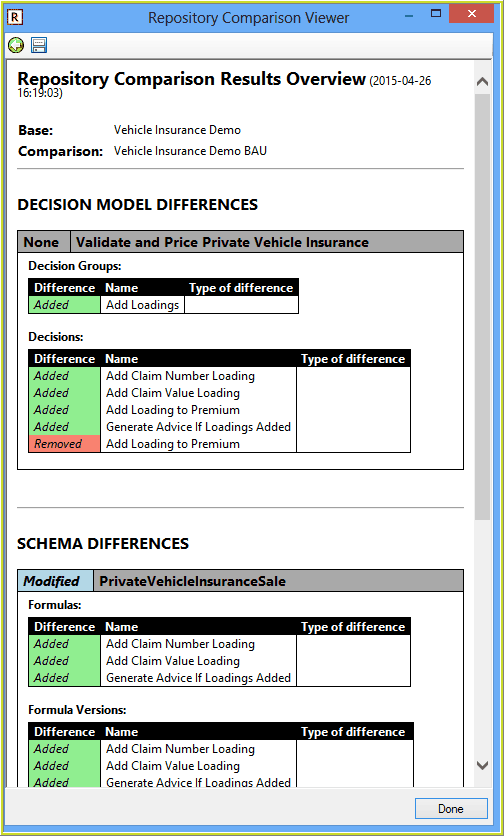
Figure 3-63(d) Comparison Overview Report
Once you are satisfied the changes are as expected, you are ready to import.
 on the Decision Model toolbar > Import Decision Model dialog box.
