Import Decision Model |
  
|
Import Decision Model |
|
Once you have viewed the changes that will be implemented when the import is processed, and have checked that all the changes that are expected have been selected and are present, it is time to import these changes.
Note: the first 5 steps are the same as the 'Compare imported decision model process'.
STEPS
1. |
If you don’t already have the Vehicle Insurance Demo repository installed, import the standard 'VehicleInsurance.idm' repository (..\Program Files\Idiom Software\IDIOM Decision Manager v4.5\Sample repositories/VehicleInsurance.idm). (See Importing a Repository) |
2. |
Open the 'Vehicle Insurance Demo' repository and open the 'Validate and Price Private Vehicle Insurance' Decision Model. |
3. |
Click the Import Icon |
4. |
Select the 'Vehicle Insurance Demo BAU' repository from the list of imported repositories. |
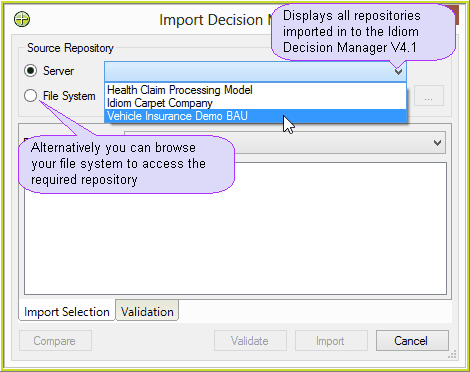
Figure 3-65 Import Decision Model dialog box.
Note: The 'Vehicle Insurance Demo' repository is not available as you cannot import a decision model in to itself.
5. |
Select the Validate and Price Private Vehicle Insurance decision model and select the decision groups and decisions that are to be imported. In this scenario we want to import the new decision group 'Add Loadings', and all of its child decisions and formulas, as these are the additions and changes made in the BAU version of the model. |
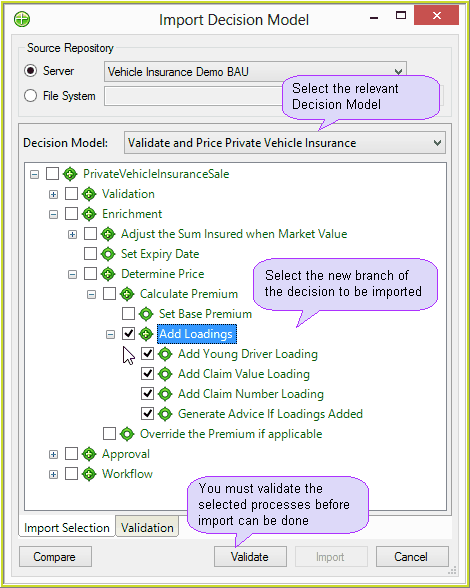
Figure 3-67: Import selection.
6. |
Click 'Validate' to identify any issues that need to be addressed prior to the import taking place > Validation screen: |
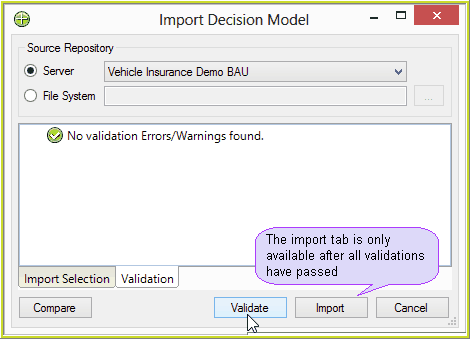
Figure 3-68: Import validation screen results.
7. |
If there are no validation errors, the 'Import' button becomes available for selection. Click 'Import' to bring the selected changes from the source model to the target model. |
The import function will import the selected decision groups and decisions in to the decision model, save the updated decision model, and display the results of the import. These results can also be saved or printed using the icons above the results display.
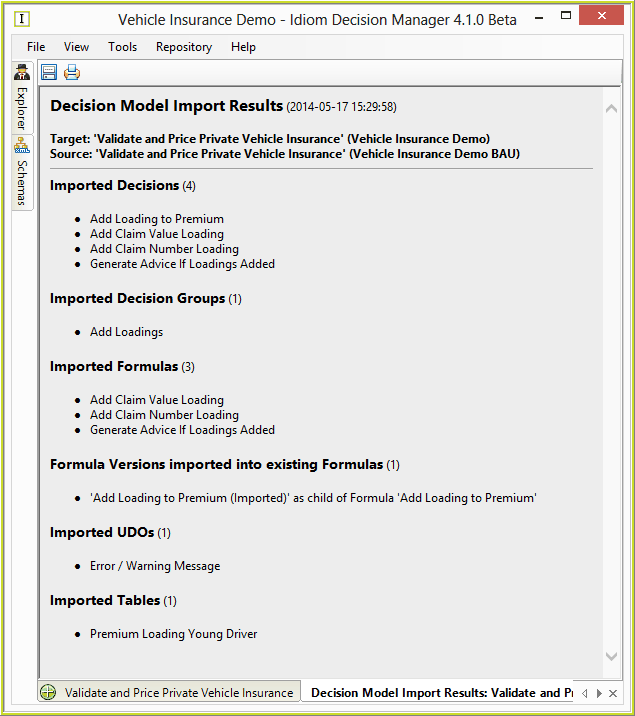
Figure 3-69: Import Results.
8. |
Close this window to return to the standard decision model palette. |
The new decisions and decision groups that have been imported are displayed.
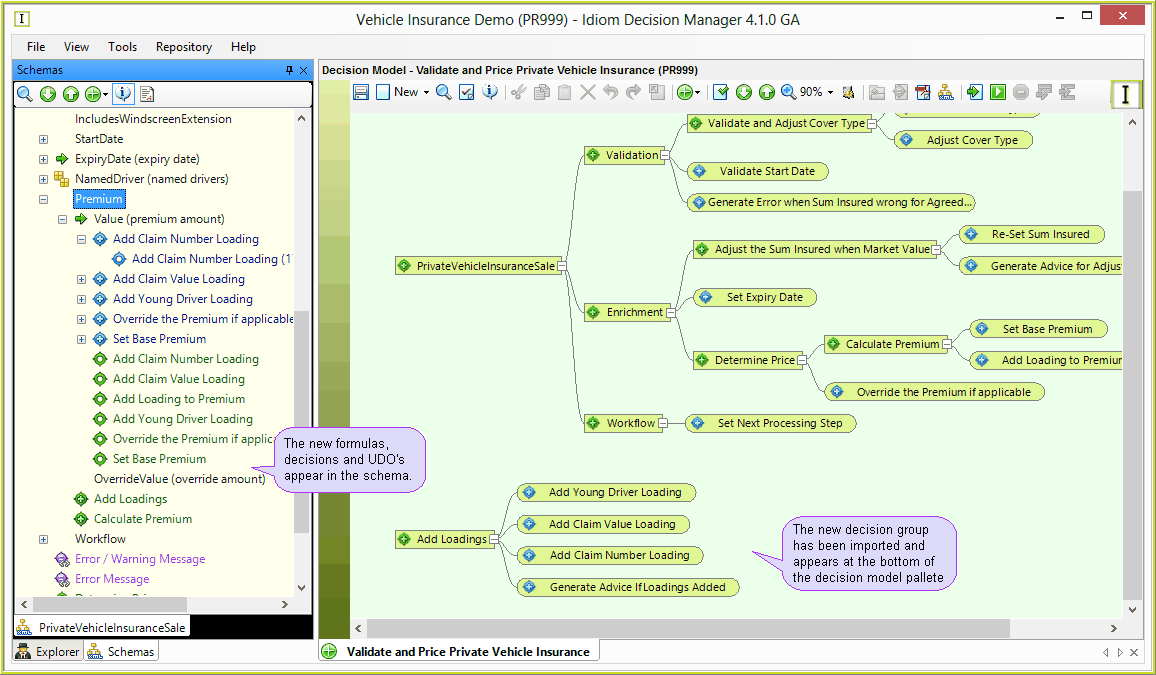
Figure 3-70: Imported Decision Group.
Note that the imported decision group and decisions are displayed separately at the foot of the palette.
Also note that the modified UDO 'Error / Warning Message' has been imported and is listed next to the existing 'Error Message' UDO in the customized Schema. The new decisions and formulas that use 'Error / Warning Message' (e.g. 'Generate Advice If Loadings Added') in the source model continue to use the new UDO after the import, while the existing decisions and formulas that use 'Error Message' (e.g. 'Generate Error when Sum Insured Wrong for Agreed Value') continue to use the existing UDO after the import.
The same applies to changes to the tables, where the newly imported 'Premium Loading Young Driver' table is used by the newly imported decisions and formulas, whereas the existing 'Young driver loading' table is used by the existing decisions and formulas.
To incorporate the 'Add Loadings' decision group into the model, you will need to drag and connect it into its correct place.
9. |
Delete the existing 'Add Loading to Premium' decision |
10. |
'Ctrl + Click' on the 'Add Loadings' decision group to drag and attach it to the 'Calculate Premium' decision group. |
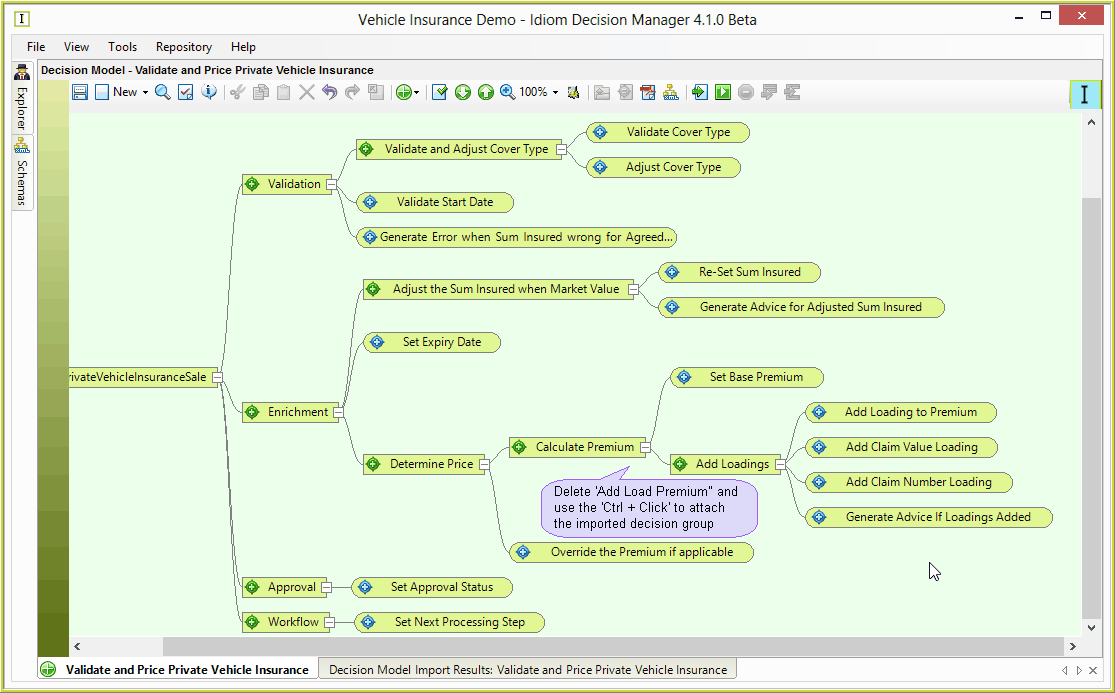
Figure 3-71: Drag the imported decision group in to its new position.
The new decisions and decision groups that have been imported are now correctly placed within the decision model.
 on the Decision Model toolbar > Import Decision Model dialog box.