Multiple Break Points |
  
|
Multiple Break Points |
|
If desired, when conducting an in-line test, you can enter multiple break points, which will enable you to 'pause' the debugger, and review the outputs from decisions up to each successive break point.
STEPS to add multiple break points
1. |
Open the debugger by clicking on the test inputs button in the decision model toolbar, and prepare an inline test for the Validate and Price Private Vehicle Insurance decision model. (see Conducting an Inline Test) |
2. |
Right-click on each decision/group you wish to inspect and select Debug > Insert Break Point. |
All decisions with break points inserted will turn blue.
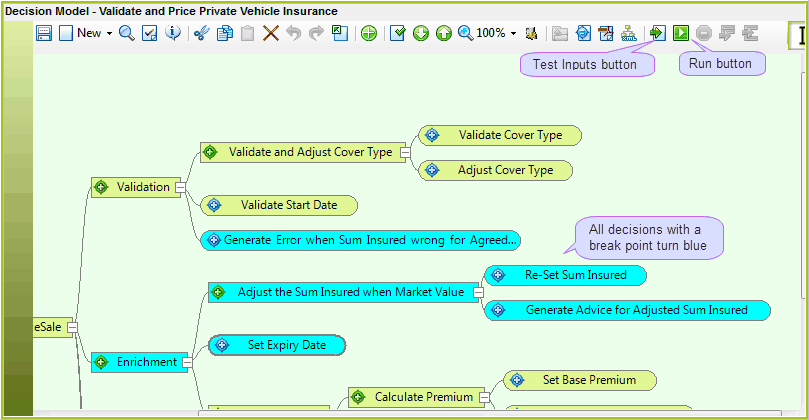
Figure 3-40(a): Multiple Break Points
3. |
Alternatively, click on the run button in the toolbar to start the test and proceed to the first break point, then right-click on any other decisions/groups where you require a break point and select 'insert break point'. |
4. |
Click on the run button again to continue on to the next break point, and so on. |
The in-line test stops at each break point, highlighting the current position of the break point in the decision model and schema pane in bright yellow as it executes.
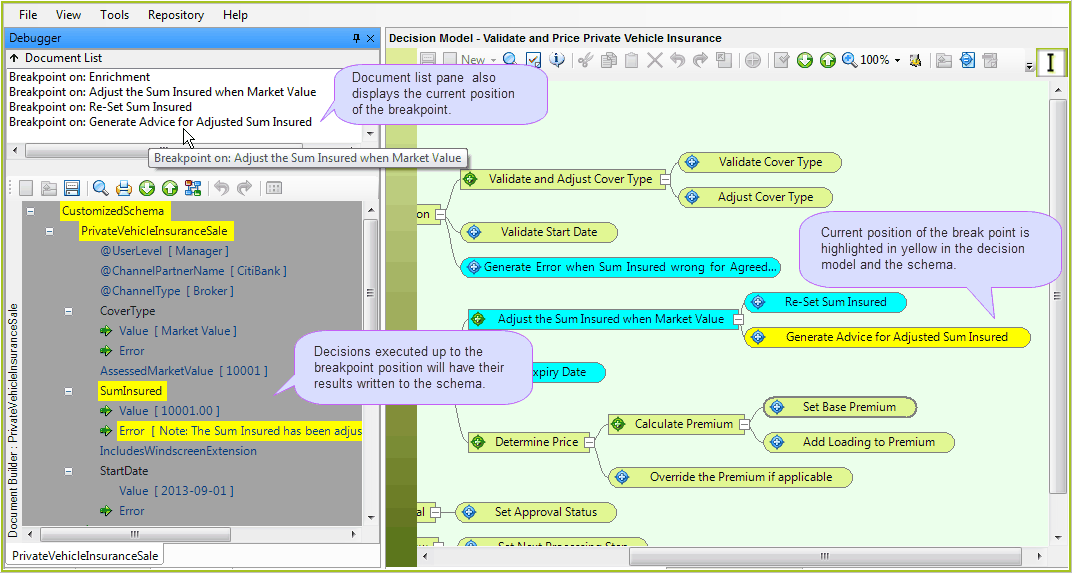
Figure 3-40(b): Running a test with multiple break points
5. |
To remove the breakpoints and exit the test part way through, right-click on any decision/group, select 'Remove all Break Points', and click the run button one last time. |
6. |
To finish the test and retain your breakpoints, continue to click on the run button until all break points have been passed and the test completes. |