Manage Database Connections |
  
|
Manage Database Connections |
|
The Named Database Connection feature allows you to configure database connections independent of table definitions. You can configure any number of Named Database Connections and later select them for a table. For example, configure Test, QA and Production named database connections and select one of the three for your table at the different stages of your development. The added advantage is that Named Database Connections can be configured in the decisionserver.config file to replace its properties specified in the repository with different properties during execution.
1.Select the Repository > Manage Database Connections menu option.
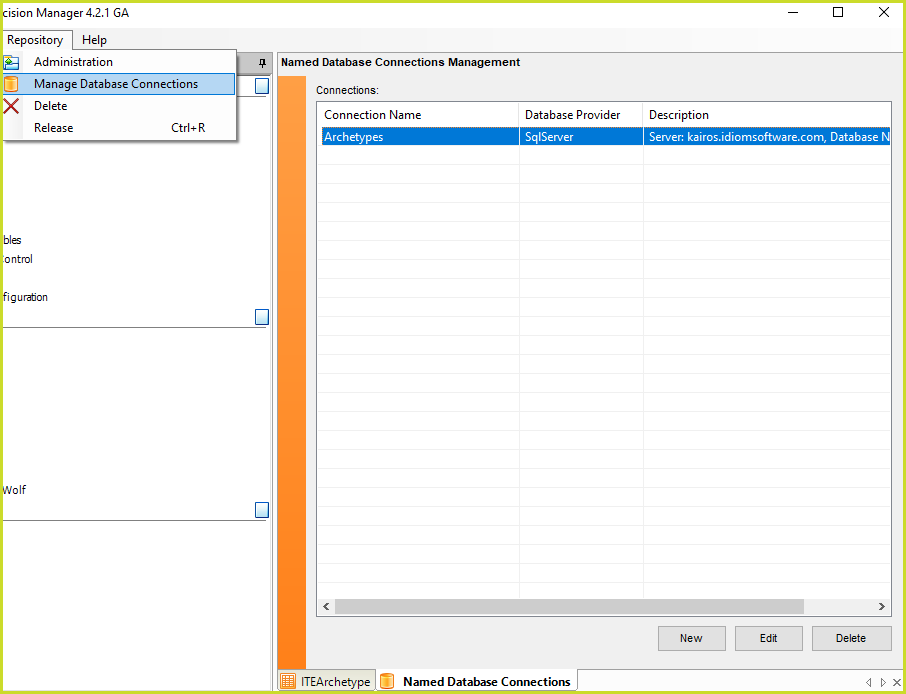
Figure 6-85a: Named Database Connections Management
2. Click on the Edit button and enter either a connection string or its components separately.
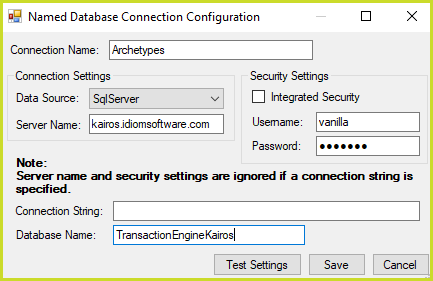
Figure 6-85b: Named Database Connection Configuration
If you need help creating a connection string then use Notepad to create a blank file, save it with the .UDL extension and double-click on it. This opens the Data Link Properties dialog box which you can use to connect to a database. The connection string is saved in the UDL file on OK.
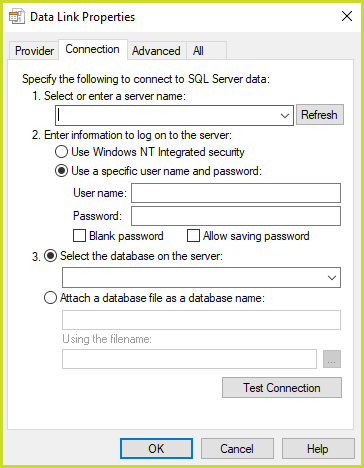
Figure 6-85c: Data Link Properties
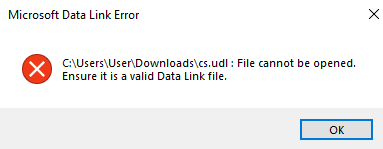
The file created with Notepad has to be blank without spaces otherwise a Microsoft Data Link Error will appear when the file is opened:
3. Open the table definition, click on the Edit Auto-link Settings button, tick the Use Named Connection check box and select a connection from the drop down box.
Selecting a Named Connection replaces previously entered Connection Settings.
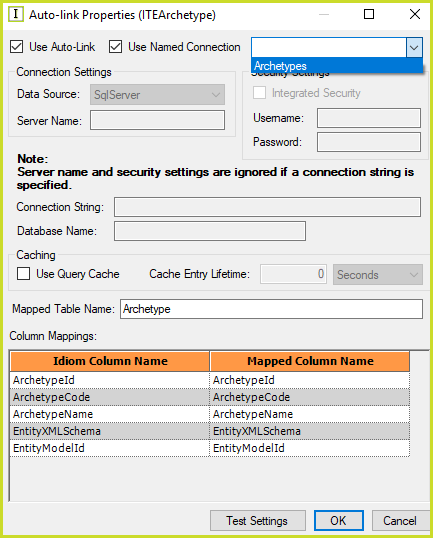
Figure 6-85d: Use Named Connection
4. Add a DbConnection entry to the decisionserver.config file in your runtime environment to specify a named connection's properties during execution
<decisionServer>
<DbConnection ConnectionName="Archetypes" DatabaseType="SqlServer" DatabaseName="someDatabase" ServerName="someServer" WindowsAuthentication="false" UserName="someUser" Password="somePassword" />
</decisionServer>