Importing a Source Schema |
  
|
Importing a Source Schema |
|
To manually import a source schema. Note that this imports the source schema only and it does not address the issue of customising it as the above Wizard did.
You can import and re-import Source Schemas at any time. When you re-import a schema and that schema already has Customized Schema(s) attached, you will need to open the Customized Schema Pane and ‘View’ each dependent Customized Schema that is based on the Source Schema. When you view the Customized Schema you can adjust the Node Visibility and Output Nodes views as needed. (See Modifying a Customized Schema)
STEPS
1. |
Click on 'Tools' | 'Schema Administration' > Schema Administration window |
Initially, the Customized Schema's table is displayed and the Customized Schema pane is empty.
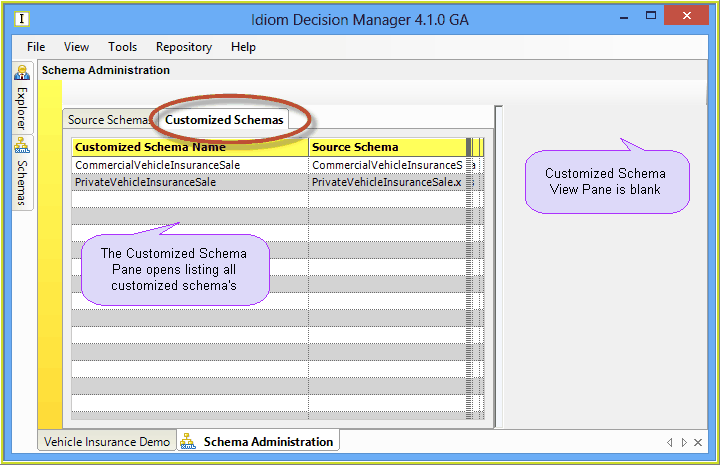
Figure 6-43: Schema Administration window.
2. |
Click on the Source Schema's tab. |
3. |
Right-click anywhere in the Source Schemas table and select `Import' > Open dialog box. |
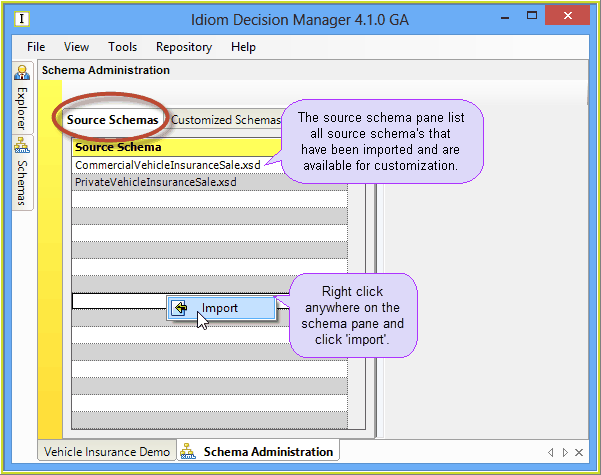
Figure 6-44: Source Schemas table in the Schema Administration window.
4. |
Select the source schema file and click on the `Open' button. |
Try importing the SimpleSchema.xsd file from ../Program files/Idiom Software/IDIOM Decision Manager v4.5/Sample Files
During this process the import process will automatically include any ‘include’ schemas named in the imported schema, so that the whole set of schemas that are linked by ‘include’ statements are aggregated into a single schema.
Any existing customized schemas based on the imported source schema will need to be re-rendered (see Rendering Schemas) by IDIOM if there have been any changes to the source schema since the customized schema was last imported and customized.
IDIOM then displays the new source schema in the Source Schemas table.
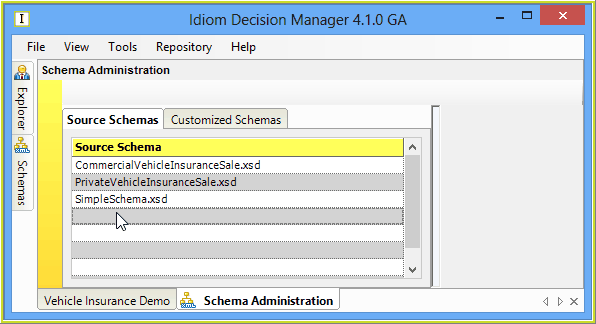
Figure 6-45: Source Schemas table displaying the new source schema
The source schemas can now be customized.