Importing a Source Schema Using the Wizard Tool |
  
|
Importing a Source Schema Using the Wizard Tool |
|
We have added a wizard to help you import an existing source schema and to build its Customized ‘schema view’ at the same time.
STEPS To import a source schema and build the Customized schema using the wizard:
1. |
Click on Tools | Wizards | Import Schema Wizard > Select Source Schema screen |
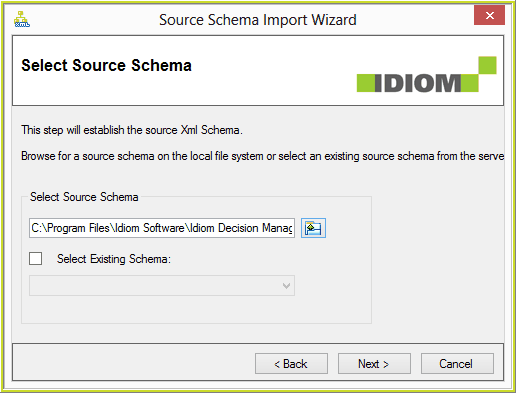
Figure 6-39: Select Source schema screen
2. |
Click on Alternatively, you can manually type the path name into the Source Schema field. |
3. |
Click Next > Select Visible Nodes dialog box |
This dialog box lists all the nodes in the schema. Click on the Expand Tree icon  to view all the nodes.
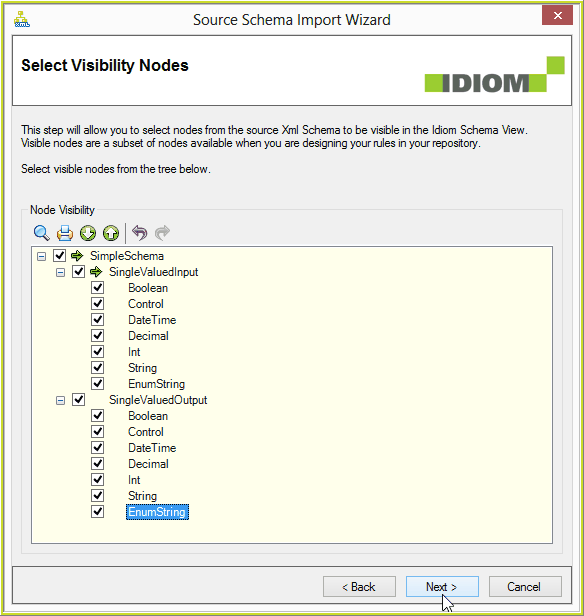
Figure 6-40: Select Nodes to be visible on the schema.
4. |
Select the nodes that will be visible by clicking in the check-boxes next to their labels. Alternatively you can right-click on the root node and select 'Check Entire Sub-tree'. |
5. |
Click Next > Select Output Nodes screen |
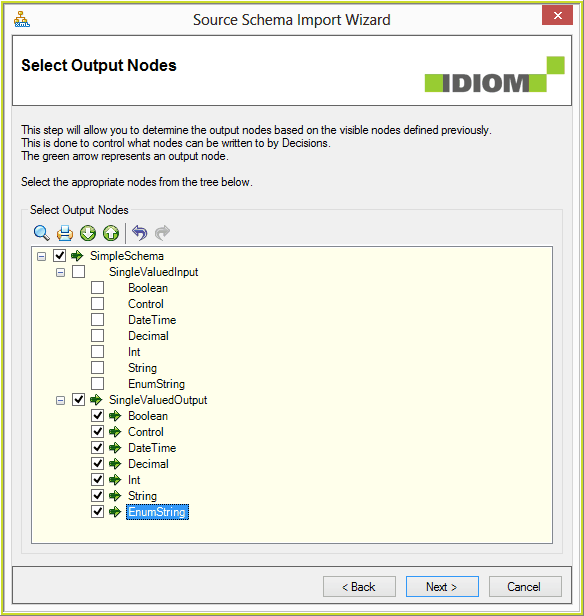
Figure 6-41: Select Source schema output nodes screen
6. |
Select the output nodes you wish to include in the imported source schema by clicking in the check-box next to their names. Alternatively you can right-click on the root node and select 'Check Entire Sub-tree'. These output nodes are then marked by |
7. |
Click Next > Save Schema As screen. |
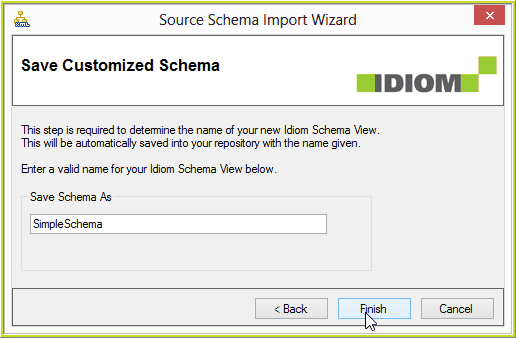
Figure 6-42: Select Finish to save the customized schema
8. |
Click Finish to complete the process and add the schema to the explorer pane. |
A dialog will confirm that the import process was successful.
9. |
Click OK |
 to locate the schema you wish to import in your directory e.g. ..\Program Files\Idiom Software\IDIOM Decision Manager v4.5\Sample Files\SimpleSchema.xsd.
 .