Understanding the User Interface |
  
|
Understanding the User Interface |
|
The IDIOM user interface is composed of a number of standard Windows-type features, including resizable panes and menus. When you start IDIOM, the program is displayed within a window that has a standard title bar and resizing buttons. This window is your IDIOM desktop.
Within your IDIOM desktop, you can have a number of panes open at one time; each pane allows you to access different IDIOM functions. A pane is very similar to a window, and it can be resized and moved to different areas on the desktop. The IDIOM desktop has two main panes. In this chapter, we will refer to their default position on the desktop (as you have the freedom to move them to a different position yourself). Firstly, on the left hand side of the desktop is the Explorer pane. To the right of this is the Workspace pane, where you can access the different IDIOM functions.
When you first open your repository, you will see the Explorer pane on the left hand side of the window; the repository title is shown in the title bar of the Explorer pane. This pane contains all of the relevant schemas, decision models, and tables for this repository.
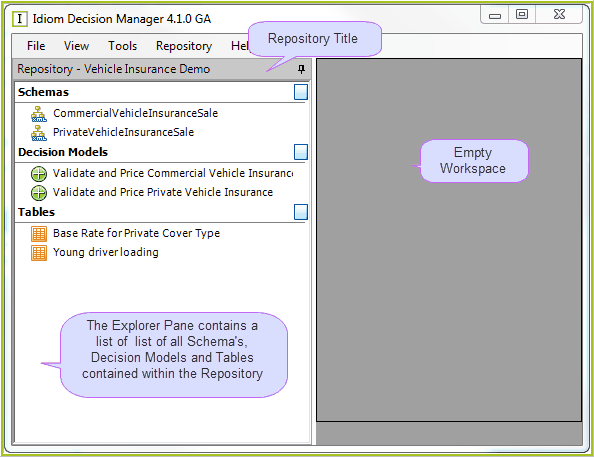
Figure 2-10: Initial IDIOM desktop, after opening a repository
The more advanced the work you are doing, the more panes, and tabs within panes, you may have open. The picture below shows a more advanced scenario, where there is a Schema open in the Explorer pane open on the left hand side of the desktop, and the decision model with decision groups and decisions open in the Workspace. At the bottom of the Explorer pane are tabs, which allow you to move between the Explorer pane and the Customised Schema pane. This chapter will describe how to set up and navigate through complex desktops like this.
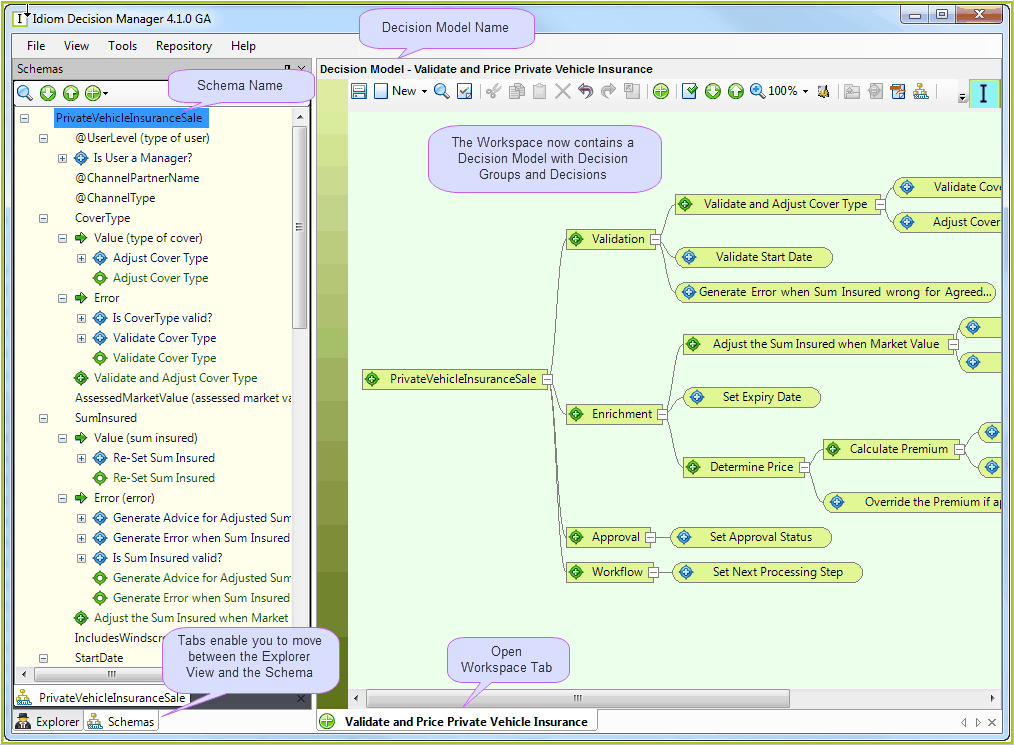
Figure 2-11: A more complex IDIOM desktop