Conducting Schema Maintenance |
  
|
Conducting Schema Maintenance |
|
To perform schema maintenance, you need to transfer decision groups, decisions, formulas and UDOs from the source schema to the new target schema. The usual process is to move all unaffected decisions, formulas, and UDOs across en masse as per step 6 below. Any decisions, formulas, and UDOs that remain on the Source Schema now need to be moved to a new node because their prior context node has been removed, moved, or renamed. These can be done one at a time, or in small sets using the move sub-tree feature.
STEPS
1. |
Right-click on a schema in the Explorer pane and select Schema Maintenance > Schema Maintenance window |
2. |
Select the appropriate target schema from the Target schema drop-down box |
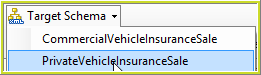
Figure 6-61: Selecting the Target schema
3. |
Select the items you wish to have visible on the schema using the Filter button. Simply click on the appropriate item. When it is highlighted in blue, the item is displayed on the schema. |
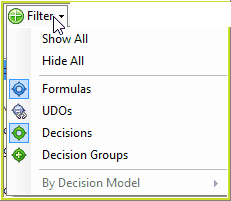
Figure 6-62: Selecting the decision model
4. |
Transfer the appropriate items by clicking on the context node for the item on the source schema and dragging it over to the appropriate context node on the new target schema. Any inappropriate nodes will be greyed out so any node whose name is visible in the target schema can act as a context node for the item you wish to transfer. |
In Figure 6-63 below, we have transferred the Is Sum Insured Valid? formula by clicking on the Error context node on the source schema and dragging it over to the corresponding Error context node on the target schema:
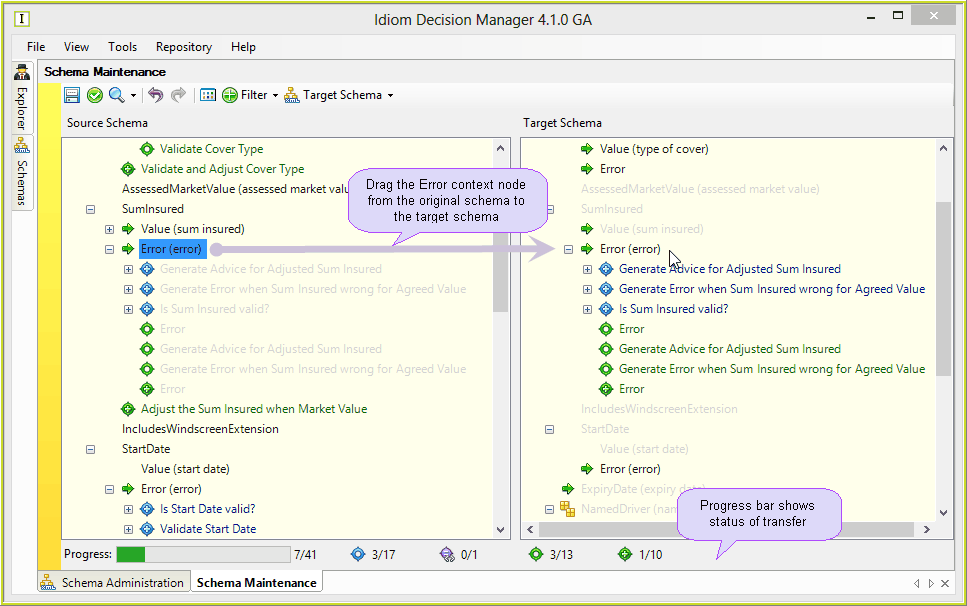
Figure 6-63: Transferring items from the Source to the Target schemas
5. |
Continue transferring the appropriate items. Check the bar at the bottom of the window to view your progress. |
6. |
Alternatively you may wish to transfer the entire tree or even a subsection of it? Simply right-click on the root node in the source schema and drag it across to the root node in the target schema. |
7. |
On the 'Source Schema' pane, right-click and drag the 'PrivateVehicleInsuranceSale' root node over to the 'PrivateVehicleInsuranceSale' root node on the 'Target Schema' pane. After letting the mouse button go, a context menu will show up - select 'Move sub-tree here'. |
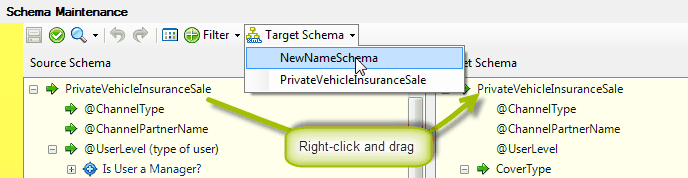
Figure 6-63(c): Drag the root node on to the Target Schema
8. |
Once you are satisfied with the items present on your new schema, you should validate it to check that there are no problems. Click on the Validation button |
NOTE: If there are any problems with the new schema, these will be listed in the Validation pane. You can correct these by clicking on the item listed in the window and making the relevant changes.
9. |
Click on the Save button once you are satisfied that your new schema is complete. |
When you have finished Schema Maintenance, you should open and check you Decision Models looking for the red error icon. If present, it indicates that a node lookup has been broken. This should also be present as a warning in the Validations.
 . The Validation pane now replaces the Source schema pane. You can toggle between the Validation and Source Schema pane views using the Toggle button
 .