Changing the Root Element of a Schema |
  
|
Changing the Root Element of a Schema |
|
Unfortunately there is no straightforward way to simply change the root element name of a schema. Currently it is necessary to recreate a customized schema and move all sub-trees across using the new customised schema as the target as described above.
In the following example we are going to change the customized schema named 'PrivateVehicleInsuranceSale' to 'NewNameSchema'
1.Open your the Vehicle Insurance Repository (see Case Study Data) and click on Tools > Schema Maintenance >Source Schema tab.
2.Right-click on the same source schema as the customized schema you are copying, e.g. PrivateVehicleInsuranceSale.xsd
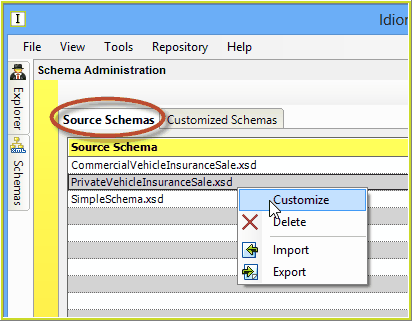
Figure 6-65(a): Customize the Source Schema
3.Click 'Customize' to recreate your customized schema (including variable nodes and their data types).
4.Save the new schema as 'NewNameSchema'.
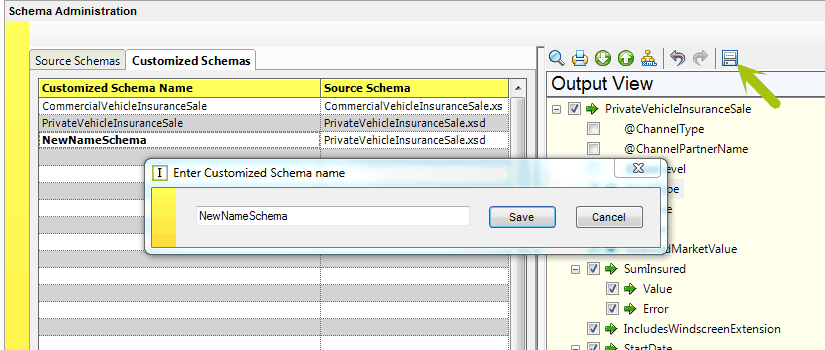
Figure 6-65(b): Name the new Schema
5.Right-click on the 'NewNameSchema' and select 'Add to Explorer', then close Schema Administration.
6.Open the associated decision model 'Validate and Price Private Vehicle Insurance' and click on the Properties button in the toolbar.
7.Right-click in the Schema Name box to add the 'NewNameSchema' to the list of referenced schemas, click OK, then save and close the decision model.
8.On Idiom Explorer, right-click on the schema with the old name, PrivateVehicleInsuranceSale and select 'Schema Maintenance' (click Yes if it asks to close all forms to continue).
9.In the Schema Maintenance form, click on 'Target Schema' and select the 'NewNameSchema'.
10.On the 'Source Schema' pane, right-click and drag the 'PrivateVehicleInsuranceSale' root node over to the 'PrivateVehicleInsuranceSale' root node on the 'Target Schema' pane. After letting the mouse button go, a context menu will show up - select 'Move sub-tree here'.
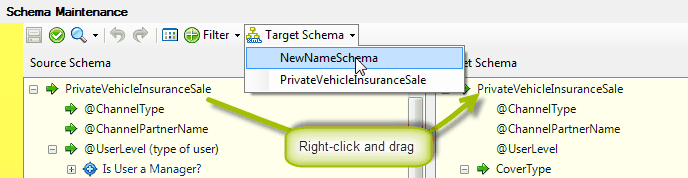
Figure 6-65(c): Drag the root node on to the Target Schema
11. On the bottom of the Schema Maintenance form, check that the progress is complete (in this case 42/42).
12. Click on the Save button on the toolbar, then close the form (it may close by itself).
13. Open 'Validate and Price Private Vehicle Insurance' decision model, then open the properties dialog for this decision model.
14. Right-click on the 'PrivateVehicleInsuranceSale' schema reference and select 'Delete Schema', click OK, then save and close the decision model.
15. On Idiom Explorer, right-click on the 'PrivateVehicleInsuranceSale' schema, select 'Delete', then click 'Yes'.
16. Open Schema Administration (Tools -> Schema Administration).
17. Under the 'Customized Schema' tab, right-click on 'PrivateVehicleInsuranceSale', select 'Delete', then click 'Yes'.
18. Select 'Repository' from the main menu, then select 'Release'.
19. Validate the entire repository - if everything was done correctly, there should be no validation errors (unless there were validation errors prior to schema maintenance).