Attaching Decisions to Decision Groups |
  
|
Attaching Decisions to Decision Groups |
|
In this section, we will explain how to attach a decision to a decision group. We will be working with the Private Vehicle Insurance decision model.
STEPS
Attach a new decision
1. |
Right-click on a decision group. |
2. |
The new decision is automatically linked to the decision group by a solid grey line. |
3. |
By right-clicking on the new decision group and selecting `New Decision' many times, you can add as many decisions to the group as you require. Initially, all of the decisions will be placed in the same position and you will need to drag them apart manually. You can also click on the Auto Arrange button |
Alternatively, to attach an existing detached decision
1. |
Hold down the Ctrl key and left-click on the decision you wish to move. |
2. |
Drag the decision from the old decision group towards the new decision group. |
3. |
When the green line has jumped to the appropriate decision group, release the left-click button (before releasing the Ctrl Key). |
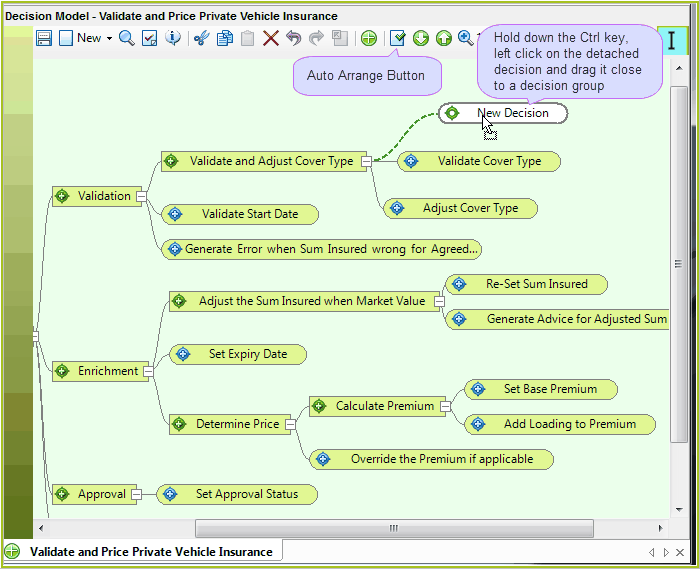
Figure 3-27(a): Right-click on a decision group to attach a new decision
4. |
When you have finished adding decisions to your decision group, click on the Save button. |
NOTE: It is also possible to add a decision group to an existing decision group by right-clicking on the existing group and selecting `New decision group'. In this way, you can create nested decisions, where one parent decision group contains further child decision groups.
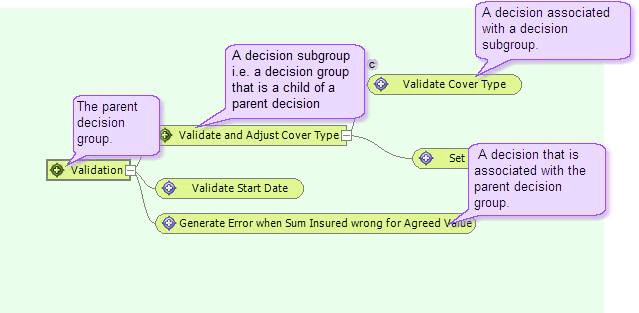
Figure 3-27(b): A nested decision group.
 in the Toolbar.