Minor Changes |
  
|
Minor Changes |
|
A minor change could include adding a node to the schema, such as adding a new node AccidentDate to the source schema. As adding this node has no effect on the existing views of the schema, none of the customized schemas will be replaced when the new source schema is imported but they will need to be updated.
To update the customized schema:
STEPS
1. |
Import the new source schema (see Importing a Source Schema) - in this example, the new modified source schema has the same file name as the old source schema e.g. PrivateVehicleInsuranceSale. We have added a node 'AccidentDate' under the Claim repeating node. You can find a copy of this modified schema in ..\Program Files\Idiom Software\IDIOM Decision Manager v4.5\Sample Files\AccidentDate\PrivateVehicleInsuranceSale.xsd). |
2. |
Click on the root node in the Node Visibility pane and select 'Check Entire Subtree'. |
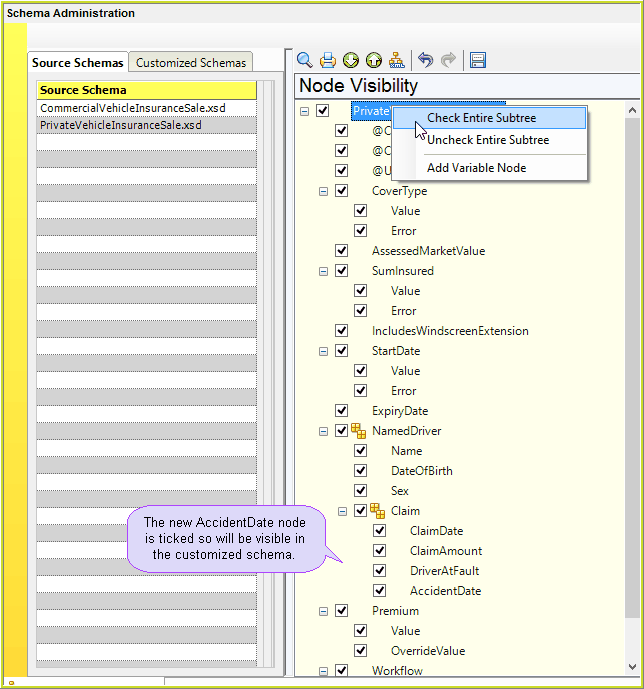
Figure 6-56: Selecting the node visibility to be saved to the customised schema.
4. |
Toggle to the Output Node view, and select the output nodes for the customised schema. |
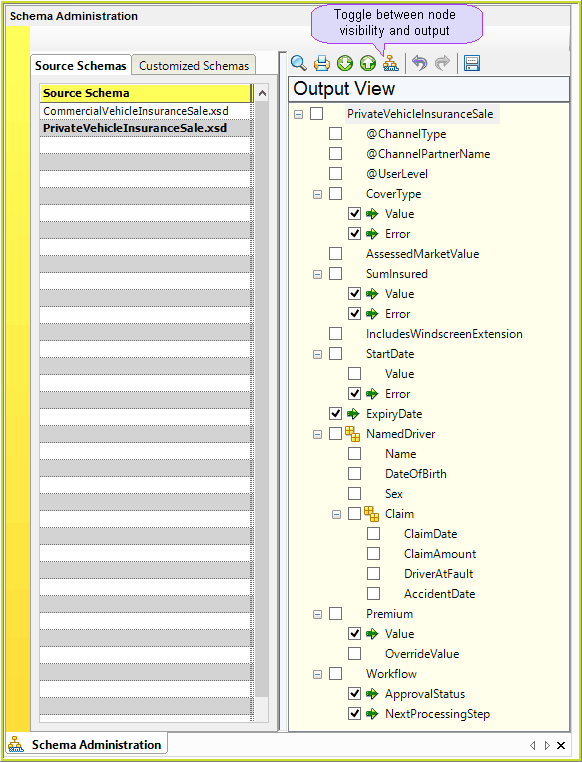
Figure 6-56(b): Select the Output nodes to be saved to the customized schema.
5. |
Click Save to go to the 'Save Customized Schema dialog box. |
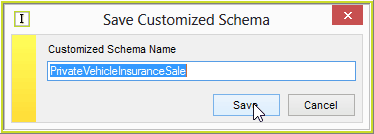
Figure 6-56(c): Save Customized Schema dialog box.
6. |
Click Save. Idiom advises a customized schema with the same name already exists, and asks if you wish to replace it. |
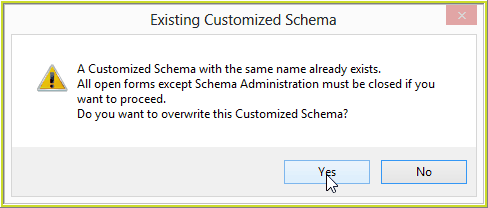
Figure 6-56(d): Overwrite existing Customized Schema dialog box.
7. |
Accept the existing customized schema name by clicking on Yes. |
8. |
Got to the Explorer pane and open the customized schema PrivateVehicleInsuranceSale. |
The AccidentDate node now appears in the customized schema.
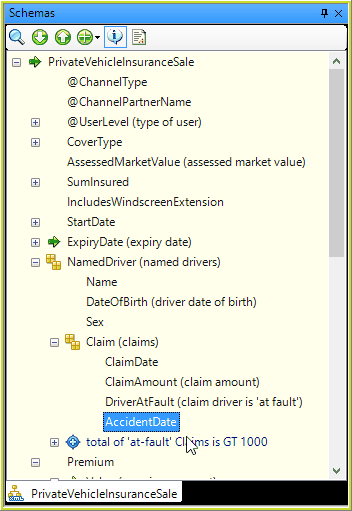
Figure 6-56(e): The AccidentDate node now appears in the customized schema.